21 September 2023
How To Set Up Auto Deploy For Laravel Applications On CPanel
In this post, I will show you how to set up auto for your Laravel application on Cpanel. I want to assume you already have your Laravel app deployed on CPanel, and your version control provider(Github, Gitlab, or Bitbucket) connected to the Cpanel server. If you haven't, please check out my previous posts below:
- Run Composer & PHP Commands On Cpanel Terminal Using Any PHP CLI Version Installed — CentOS & CloudLinux
- How To Connect Cpanel To Github, Gitlab, And Bitbucket And Deploy Private Repositories
- How To Deploy A Laravel Project On Linux Shared Hosting In 5 Minutes
Setup Deployment Script
We need to create a deploy.sh bash script inside the public_html directory of our CPanel and paste the code snippet below.
#!/bin/sh

# Change to the project directory.
cd ~/path/to/project

# Pull the latest changes from the git repository
git pull origin main

# Install/update composer dependencies
composer install --no-interaction

# Run database migrations
php artisan migrate --force

# Clear caches
php artisan cache:clear

# Clear and cache routes
php artisan route:cache

# Clear and cache config
php artisan config:cache

# Clear and cache views
php artisan view:cache
The code snippet above when executed, will then change to the project directory and pull the latest changes, install composer dependencies, and other necessary artisan commands for our Laravel application.
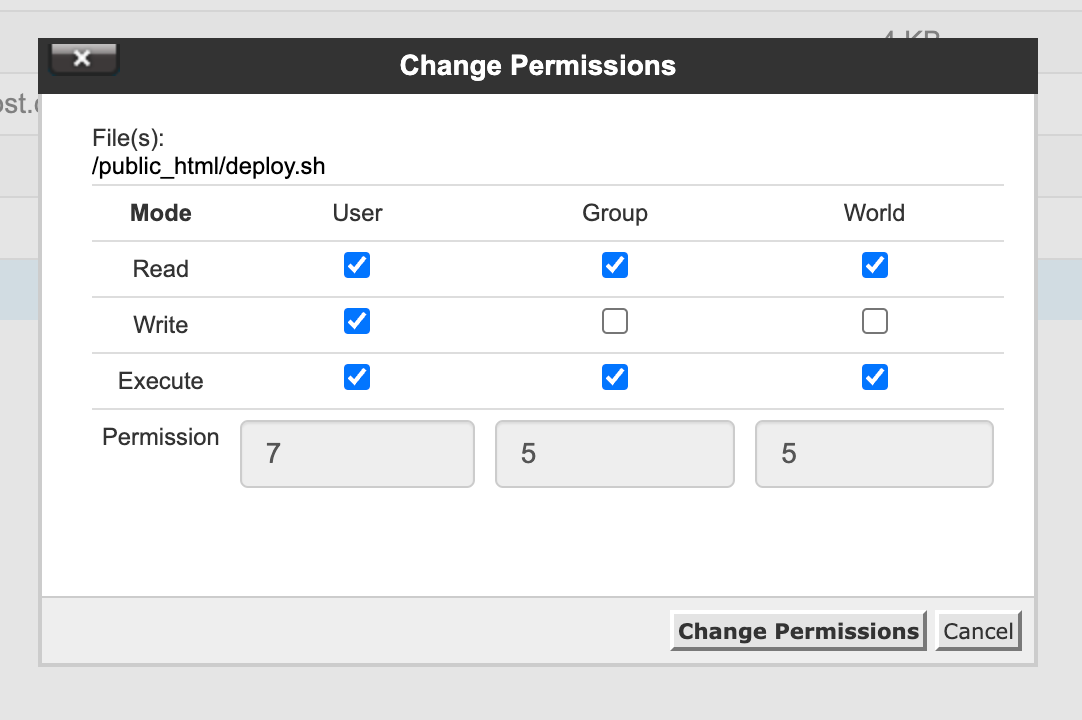
Let's make the deploy.sh bash script executable by running the command below on our CPanel terminal.
chmod +x ~/public_html/deploy.shWe can manually change the bash script file permission using CPanel file permission dialog.
Setup Cpanel Webhook
- Create a Cpanel subdomain like this:
webhook.yourdomain.comor whatever works for you. - Create an
index.phpfile inside the subdomain directory~/public_html/webhook.yourdomain.comand paste the code snippet below:
<?php
// Execute deploy script
$output = shell_exec('. ~/public_html/deploy.sh');

// Send back execution output to the webhook originator.
echo $output;

// Return OK response
header("HTTP/1.1 200 OK");
This PHP script will execute our bash script, echo the output, and return 200 HTTP responses. You can test this by making an HTTP request to this subdomain using any HTTP client of your choice.
If your subdomain is returning error 500, create a
.htaccessfile inside the subdomain root directory and paste the code snippet below:
<IfModule mod_rewrite.c>
    RewriteEngine On
</IfModule>
Github, Gitlab & Bitbucket Setup
Navigate to the webhook settings of your repository and add your cpanel webhook URL(https://webhook.yourdomain.com/) for push events. You can test this out by adding a commit to your code repository.
If you are using GitHub, you can check your webhook logs under Recent Deliveries tab in your repository webhook settings. You will see a log of all the webhook requests that have been sent to your Cpanel server. The same applies to Bitbucket but not Gitlab.
Alternative Using GitHub Action
I found a better way to make auto deploy work on cPanel using GitHub Actions, and it works all the time. I wrote a guide about it here — How To Set Up Auto Deploy For Laravel Applications On CPanel Using GitHub Action
Join my inner circle newsletter
Be the first to hear about anything I publish, launch, or think is helpful for you. Subscribe here
Hey, have you tried Litehost lately ?
Litehost is a web hosting platform for PHP & Laravel developers with Composer, Git, PHP & CLI pre-installed. Try it now