08 November 2019
Zero Downtime Deployment With Laravel Envoy and BitBucket
I learned about Zero downtime deployment while working on our server at Qwickpage. That's where I first implemented zero down time deployment uisng Laravel Envoy and GitLab. This week I did another setup, this time with BitBucket. It was quiet less stressful with Bitbucket.
What is Zero downtime deployment
Zero downtime deployment is a deployment method where your website or application is never down or in an unstable state during the deployment process. To achieve this the web server doesn't start serving the changed code until the entire deployment process is complete.
Now you get the gist lets get started.
I am assuming you have a Laravel application you want to deploy, a VPS (virtual private server) and also a Bitbucket account.
Server Setup
Digital Ocean has a lot of server setup tutorials. So I will assume you have already done your VPS setup.
Login to your VPS and create a base directory for our project deployment and cd into that directory.
mkdir ~/betaApp && cd ~/betaAppFor this setup lets pull Laravel from Github so we can make a copy of the storage directory and .env.example file. We will make use of them in all our deployments.
git clone https://github.com/laravel/laravel.git  initial
cp -a ~/betaApp/initial/storage ~/betaApp/storage
cp -a ~/betaApp/initial/.env.example ~/betaApp/.env
You can now update your ~/betaApp/.env file with all credentials your app will need to run.
We are goin to create two more directories inside the ~/betaApp directory.
mkdir ~/betaApp/sources
mkdir ~/betaApp/current
The sourcedirectory will contain all the releases of our app that has been deployed to the server. The currentdirectory will be a symbolic link (reference) to the last release that was deployed to the server. So make sure you point your server to this directory ~/betaApp/current/public.
That all for now, lets go setup our deployment script :)
Laravel Envoy
Laravel Envoy provides a clean, minimal syntax for defining common tasks you run on your remote servers. Its pretty simple.
Create a new file (Envoy.blade.php) inside your local project root directory. this file will contain all the task we want to run during deployment. Here is the one we are going to use.
@servers(['production' => 'user@server_ip'])

@setup
    /* Project repository url */
    $repo = 'repository_url';

    /* Project base directory as setup on the server*/
    $appDir = '~/betaApp';

    /* repository branch we want to deploy*/
    $branch = 'master';

    date_default_timezone_set('UTC');

    /* we will use timestamp as directory name of
     every release */
    $date = date('YmdHis');

    /* directory where our release will be saved */
    $builds = $appDir . '/sources';

    /* full path to the release we are deploying */
    $deployment = $builds . '/' . $date;

    /* path to the symlink directory on the server */
    $serve = $appDir . '/current';

    /* path to our server .env file */
    $env = $appDir . '/.env';

    /* path to our storage directory */
    $storage = $appDir . '/storage';
@endsetup

@story('deploy')
    clone
    install
    live
@endstory

@task('clone', ['on' => 'production'])
    git clone -b {{ $branch }} "{{ $repo }}" {{ $deployment }}
@endtask

@task('install', ['on' => 'production'])
    cd {{ $deployment }}
    rm -rf {{ $deployment }}/storage
    ln -nfs {{ $env }} {{ $deployment}}/.env
    ln -nfs {{ $storage }} {{ $deployment }}/storage
    composer install --prefer-dist
    php artisan migrate
@endtask

@task('live', ['on' => 'production'])
    ln -nfs {{ $deployment }} {{ $serve }}
@endtask
Inside our Envoy.blade.php file we have our @server section which contains the server we are deploying to. The @setup section is where we decleared all the variables we are going to be using during deployment. I believe those variable with those comments are self explanatory.
We have three @task section which includes the clone task (clone from our repository), the install task (removes the storage directory and the .env file, symlink our default storage directory and .env file, install all the php packages for the app and run migrations) and the live task (symlink this current release to the current directory).
The @story section is where all the @task are called in the order we want it to run.
BitBucket Pipeline
I will assume you already have your app pushed to Bitbucket. Create bitbucket-pipelines.yml file inside your project root folder on your local machine.
image: php:7.2-fpm

pipelines:
  default:
    - step:
        script:
          - apt-get update && apt-get install -qy git curl libmcrypt-dev
          - apt-get update && apt-get install -y unzip openssh-client
          - yes | pecl install mcrypt-1.0.1
          - curl -sS https://getcomposer.org/installer | php -- --install-dir=/usr/local/bin --filename=composer
          - composer install
          - composer global require laravel/envoy
          - ~/.composer/vendor/bin/envoy run deploy
So our Bitbucket pipeline will pull php7.2 docker image, install all necessary php extenstion, install composer, install Laravel Envoy and then execute our envoy script.
Deployment Keys
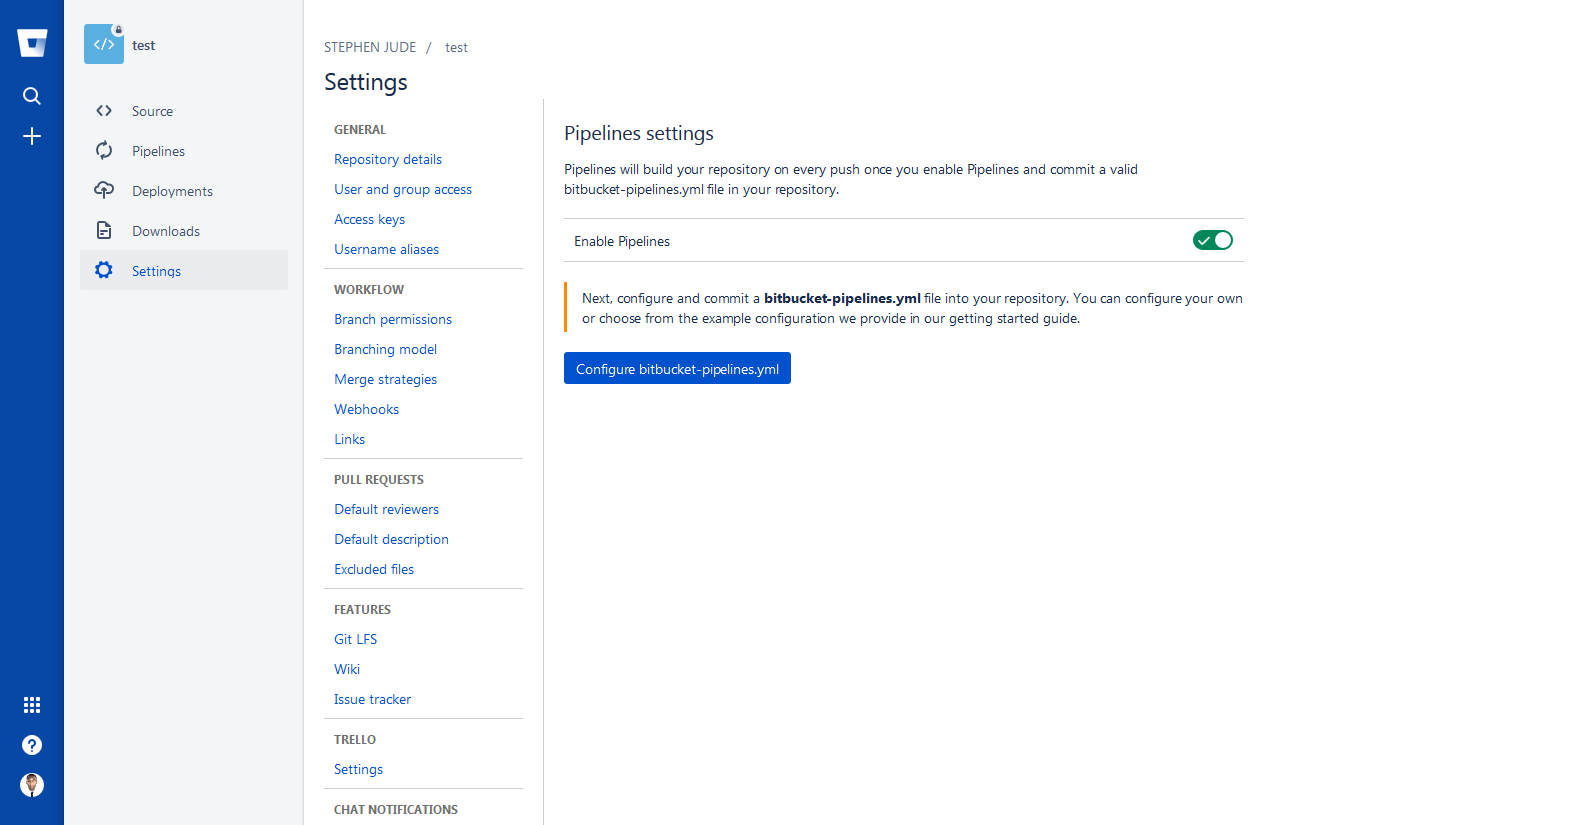
GitBucket is going to help us generate a public key for our deployment. Goto the settings of your project repository on BitBucket. Under Pipeline click settings and enable pipeline for your project. You will be asked to configure your Pipeline but you don't have to, we have already done that.
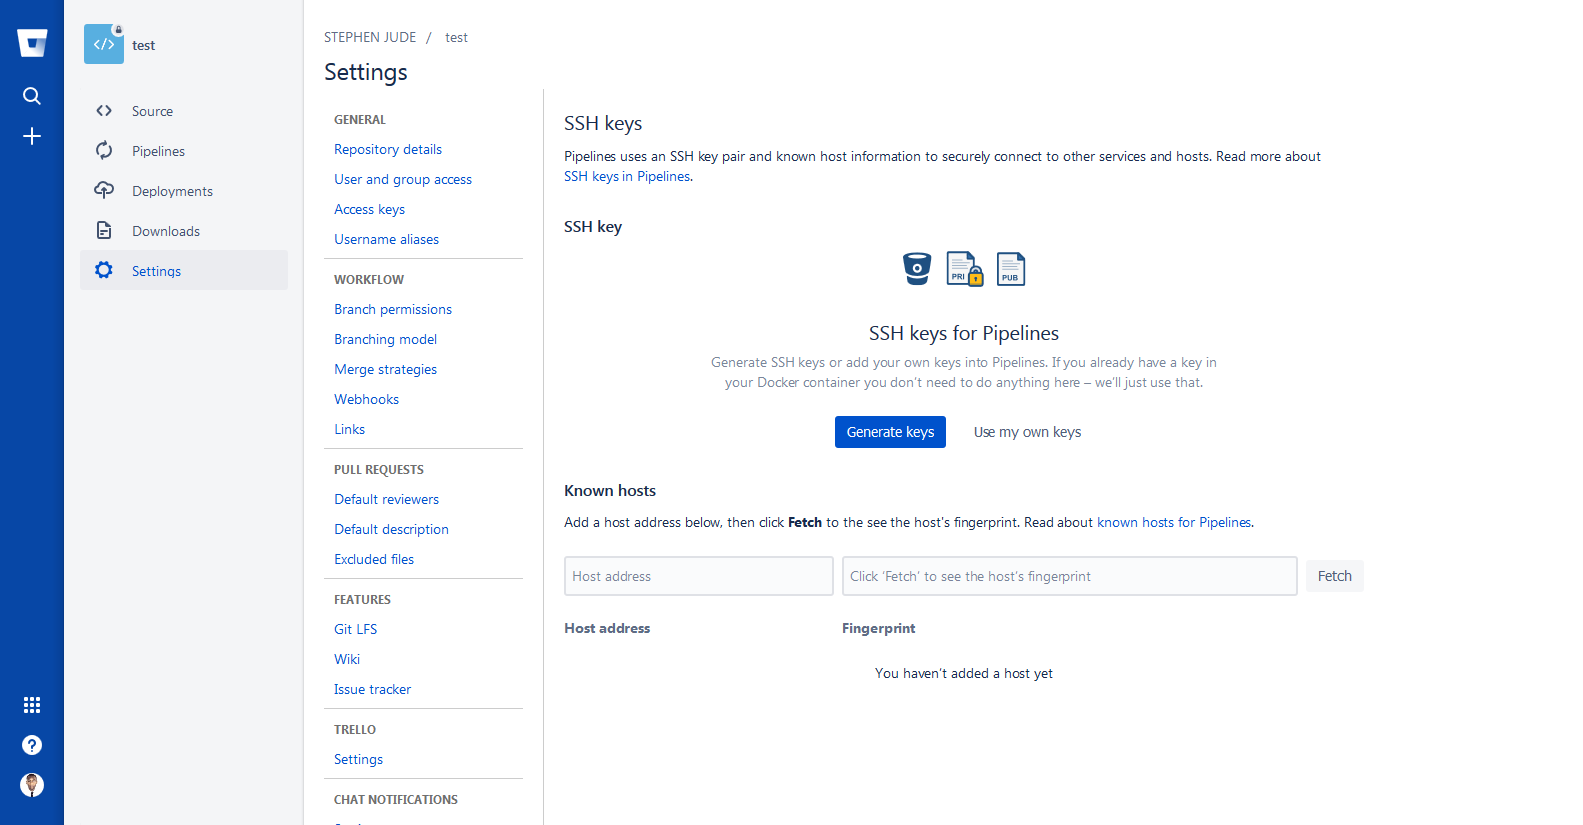
 Now lets generate a public key. Go back to the settings of your project repository on BitBucket. Under Pipeline click SSH Keys, when the page is done loading click on generate key.
 Now copy the public key to your
 ~/.ssh/authorized_keys file on your VPS. Go back to page where you generated the SSH key on BitBucket, add your VPS domain name or IP address and click the fetch button. If you added the public key successfully, BitBucket will be able to fetch your host's fingerprint and youe are good to go.
Finally go back to your project on your local machine, commit all these changes and push. Check your BitBucket pipleine to know when the deployment is complete.
Conclusion
Now your have implemented a Zero downtime deployment you can revert back to any previous release by running this command on your VPS
ln -nfs ~/betaApp/sources/prev_release_dir ~/betaApp/currentLets continue the discussion on twitter.
Join my inner circle newsletter
Be the first to hear about anything I publish, launch, or think is helpful for you. Subscribe here
Hey, have you tried Litehost lately ?
Litehost is a web hosting platform for PHP & Laravel developers with Composer, Git, PHP & CLI pre-installed. Try it now